
How To Change the Oil in a Snowmobile

Tips for changing oil on a Yamaha Nytro
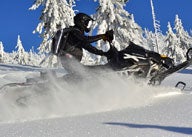
Winter is on its way. Early fall snow already dropped four feet (!) on parts of northwestern South Dakota and is settling in on the Rockies and reminding the Midwest we’ll soon be on the snow. Now is the time to get your snowmobile’s preseason service done, such as changing the oil.
For those of you who own a Yamaha Nytro, its owner’s manual recommends changing the motor’s oil after completing the engine’s break-in cycle, which is 500 miles, then thereafter changing the oil at 2500-mile increments. We believe, regardless of mileage during the snowmobiling season, it’s a good practice to start off the season with fresh oil. Why is that? As the snowmobile sits in storage during the non-snow season, condensation settles in on the motor and its oil. Yes, you could get away with another season on the motor’s oil, but we believe to protect your snowmobile investment, fresh is better.
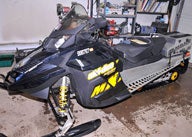
During our long-term evaluation of the Snowmobile.com 2012 Yamaha Nytro MTX with Mountain Performance Inc. turbocharger at the 500-mile mark, we followed Yamaha’s counsel and set off to change the oil. Yamaha sent us its oil-change kit designed for two- and three-cylinder models. The oil change kit comes with 0/40-weight full-synthetic oil, oil filter and oil plug gaskets; Yamaha part number is LUB-SMBCG-KT-05. Yamaha retails this kit at US $61.99.
Late winter 2013, we knocked out this “to do” with the enlisted help of Troy Johnson to help us go step-by-step – the right way – through a Yamaha Nytro oil change process.
How To Install a Snowmobile Graphics Kit
Here is a little plug for Johnson. After selling his Yamaha dealership, Johnson began developing high-performance products for Yamaha snowmobiles (foremost) and also for other manufacturer makes and models. Johnson specializes in lightweight components, turbochargers and suspension tuning. Johnson also offers backcountry tours of the Grey’s River region near Alpine, WY. Not to end there, Johnson has a Yamaha commitment to build Team Yamaha’s custom hillclimbers for the Rocky Mountain Snowmobile Hillclimb Association (RMSHA) race circuit. If you’d like more info, contact him at Lincoln County Customs (LCC), Alpine, WY (307-654-6637).
 You’ll need a basic assortment of hand tools like this, including a torque wrench, to properly do an oil change on a Nytro motor.
Many Yamaha owners may take their sleds into the dealership for the preseason tune up, but you can do it yourself. Here’s a basic “How To” on changing the oil on your Nytro, regardless of model.
Start and warm the motor and let it idle at least 10-minutes to ensure oil is free flowing.
Since you’ll be working underneath the snowmobile, elevate it. In our case, Johnson lifted the Nytro with a hydraulic lift then set it on three aluminum dirt bike stands, one under the track and one under each ski (beneath the saddle). Whatever you use, for safety’s sake, make sure the stands holding the Nytro have the strength and stability to uphold it.
Next remove hood and the two side panels.
Using a flat head screwdriver, remove the plastic pushpins on the side of the lower plastic side covers that are connected to the belly pan.
 This oil plug will be what you’re looking for to drain the engine’s three plus quarts of synthetic oil.
To remove the other attaching panel bolts, two bolts on each side, use a 10mm socket. Here, make a mental note of how the black-colored flanged-washers are installed, this to ensure proper reinstallation. Additionally, save all fasteners, as these too will be reused. If you have a smartphone with camera, shoot a picture as a memory helper.
Remove the belly pan by removing the four pushpins, which face up, then remove the pushpin in the front of the belly pan. Additionally, remove the pushpin that is positioned horizontal and faces towards the back of the sled.
 Getting the Nytro’s “plastic” removed to reach the engine and oil filter will be a challenge of its own.
After removing all covers, fasteners/push pins and the belly pan, the oil filter and oil drain plugs are easily accessible. At this point, Johnson said since the motor and drive components are exposed, inspect the drive train and service (clean) the clutches, and check clutch alignment. We can’t stress this enough. Loose mounting bolts, a frayed belt, squeaky bearings, and solidified dirt and grime can, and will, deteriorate a snowmobile’s clutches, electronics and a host of other essential go-forward parts.
How to Set Up Your Sled’s Suspensions
Secure a drain pan and a 5mm Allen wrench.
Below the oil filter are several Allen head screws, choose only the one with the copper washer (this is the oil drain plug); remove the plug with the 5mm Allen wrench allowing the oil to drain into the catch pan.
Remove oil filter. Note, very little oil holds up in the engine block because Yamaha uses a dry sump system. In the Nytro’s case, most oil is held in the reservoir to the motor’s right side.
 Once you’ve removed the plastic and exposed the engine and its components, take the time to service the clutches and other drive components.
Here is some dry sump 101: Unlike a wet sump system used in automotive applications where the engine oil resides in a pan under the engine block, dry sump systems are used in applications where space is limited and a low motor placement is essential, making it necessary to eliminate the oil pan to keep the engine block low. Another reason for a dry sump is to reduce the risk of oil starvation or oil aeration. When a snowmobile is cornering hard or hillclimbing, the many positions a mountain sled finds itself in may prevent oil from being pulled up through a conventional wet sump pick up tube. A dry sump system helps provide a constant oil flow to the motor.
But dry sump systems cannot guarantee a constant oil flow if the snowmobile is left running in an inverted or upside down position. Johnson recommends mountain riders install a tether to kill the motor and prevent expensive damage if an upside down situation should occur.
Now, then, let’s get back to our oil change.
While the crankcase drains of oil, secure a second oil drain pan and place it under the oil reservoir and remove the drain plug on the oil reservoir using a 12mm wrench. Approximately three and a half-quarts will drain from the reservoir.
 Today’s four-stroke snowmobiles fit the engines in low and hard-to-reach positions, so take the time to do a complete service when changing the sled’s oil and filter.
In the oil filter box are two small copper washers. Remove washers from both drain plugs and replace them with the new copper washers supplied in the Yamaha oil change kit.
Now it’s time to re-install the drain plugs. Yamaha recommends using a torque wrench on both plugs and the filter. On the crankcase plug, torque down to 7 foot-pounds, on the oil reservoir, torque down to 11 foot-pounds.
Place a small amount of oil on the oil filter gasket, install the oil filter and torque down to 10 foot pounds.
After plugs and filter are reinstalled, fill the motor with oil by removing the filler dipstick/low oil sensor cap on top of the oil reservoir by unplugging the connector, then unscrewing the filler cap. Pour into the filler tube, approximately three and a half-quarts of the 0/40 weight synthetic oil.
After pouring in the required oil amount, start the motor and check for leaks, allowing the motor to idle for three to four minutes, then shut down. If no oil leaks appear, remove oil fill cap and check for proper oil fill level. Johnson explained it is imperative to check the engine oil level shortly after shutting off the motor to avoid pulling a low oil level reading as the oil will drain back into the crankcase showing a low level.
How to Store Your Sled in the Off-Season
Avoid tightening down the fill plug when checking the oil level as it acts as a dip stick (level indicator), in other words, ensure oil level is to the top of the hash marks on the dip stick; proper oil level is just under four quarts.
Tighten down the fill cap and snap on the oil sensor plug.
Once this is accomplished, your oil change is complete.
Remove the oil-filled drain pans, as these are an undesirable spot to fish out a dropped pushpin or bolt. Furthermore, used oil is not a welcome product on skin. We recommend wearing oil-resistant gloves such as nitrile gloves.
Reinstall all the plastic coverings and belly pan and side panels, with fasteners, in reverse order from initial removal. This is where your photo “memory” comes in handy.
After completing the oil change, and while the snowmobile is elevated, check track tension and alignment. Refer to the owner’s manual to make proper tension and alignment adjustments. If a track is loose, it will ratchet on the track drivers and will chew down the driver’s cogs, and the track itself will become inoperable. Likewise, improper alignment will prematurely wear down the slide rails’ hyfax causing expensive repair. Also, spin the idler wheels to ensure these move freely. Again, consult the owner’s manual for proper rear suspension pivot point lubrication.
For the front suspension, do likewise. Ensure the A-arms move freely up and down and the pivot points are free of rust and dirt. Lubricate as needed.
Plan on about 45-five minutes to one hour to complete this oil change. (This for first-timers; subsequent oil changes will be shorter as familiarity gains traction.) Also, taking a few more minutes to verify rear suspension movement, track wear, and front suspension function can help ensure your Nytro (or any snowmobile) is properly readied for winter use.
We are glad we enlisted the help of a professional – Troy Johnson of LCC – before attempting this on our own. Like any automotive motor, proper maintenance will help ensure the engine will remain a long-lived motor.


 Your Privacy Choices