
End of Season Snowmobile Service
Tips for storing your sled so you’re ready to ride when next season’s first snow hits
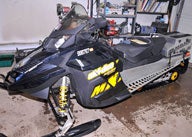
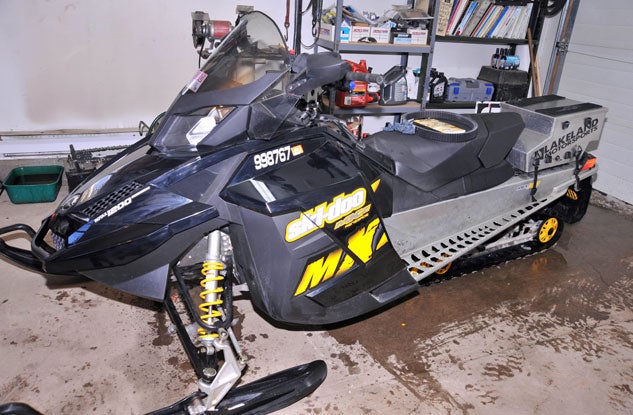
One of the best ways to make certain your sled is ready to ride when the first snow hits early next season is to take time now in putting your sled into summer storage. Although we used our Ski-Doo 1200 4-TEC as the project sled, most of this end of season service information and how-to tips can be applied to any sled. So, let’s get started!
The Ski-Doo 4-TEC model and four-strokes in general have grown in popularity with trail riders. That’s why we’ve decided to take a close look at an end of season service on this type of snowmobile. While this maintenance is much like any other snowmobile, there are a few things that make this 4-stroke service unique. We also found a few things to make this unit better and make for some trouble free riding all of next season.
Fuel storage and Oil Change
Starting off with the fuel issue — there are several thoughts on fuel storage, but with the modern snowmobile and its fuel injection systems there are some important considerations. These systems do not like to be run dry; it’s hard on the fuel pump. The pump relies on the fuel itself to lubricate and to keep the pump cool. So draining the fuel is NOT an option. We suggest storing your snowmobile with a ¼-tank of fuel with the proper amount of fuel stabilizer. Now… before you start the engine next season, fill the fuel tank first. The fresh fuel will dilute the remaining old fuel, making it ready for use.
How To Change the Oil in a Snowmobile
Lube, oil and filter – this is unique to the 4-stroke sled and it’s done the same way as most oil changes. Draining the oil from the bottom of the crankcase is relatively easy. Remove the drain plug, located underneath the belly pan in the center. The biggest part of this procedure on the 4-TEC is removing the exhaust muffler from the right side of the engine. This must be done to gain access to the oil filter. Once the muffler is removed, the oil filter housing is visible toward the front of the engine.

The filter housing cover has three bolts holding down the top cover of the assembly, after removing these bolts, it is easy to pull out the old filter and wipe everything down, so that it is clean, to prepare for the new filter. You might want to check with your dealer about service update as we found BRP had issued an update on our project sled. The updated oil filter now has a check valve inside. After the old oil is wiped clean, give the new rubber seals on the new oil filter a touch of new oil.
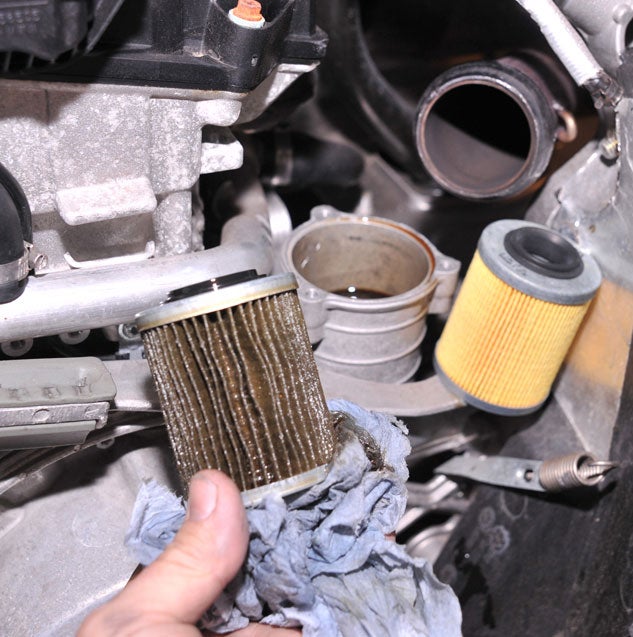
This will help slide the new filter into place without any binding trouble. Replace the housing cover. Make sure you have the drain plug in place after draining and fill the engine with new oil. BRP made this job easy, just make sure you check the oil level after the engine has been running and the oil has a chance to circulate through the new filter so you are getting a proper oil level reading.
How To Install a Snowmobile Graphics Kit
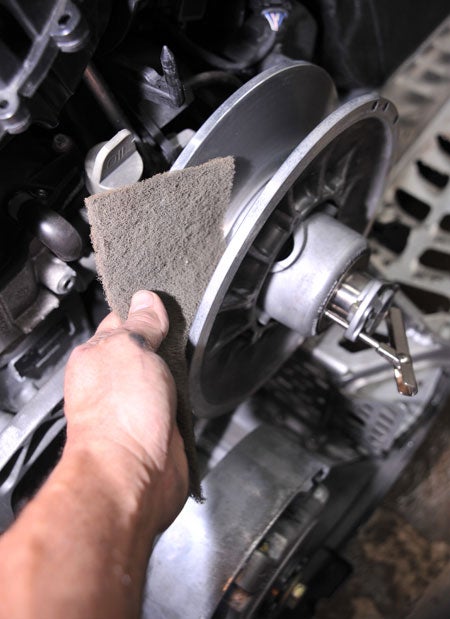
Clutch Service
Clutch cleaning and setting the drive belt deflection — removing the drive belly is a simple operation when you use the BRP tool that is found in your tool kit.
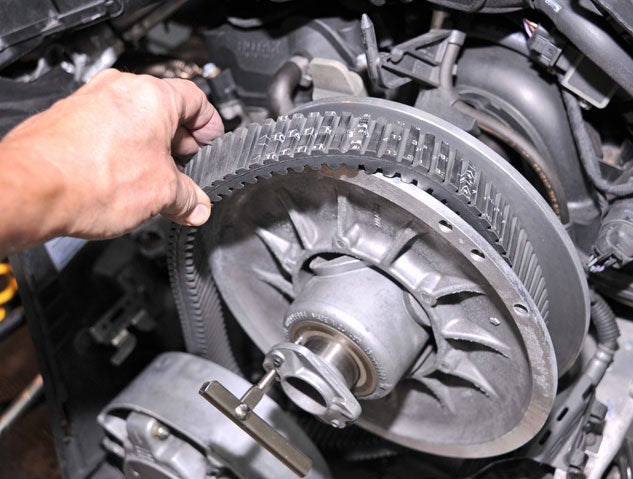
After the belt is removed it is easy to clean the clutch surfaces with a Scotchbrite pad. Follow up with a thorough cleaning with acetone and a clean rag.
In our case, we found that the belt was worn thin and we couldn’t get the proper belt deflection, so we opted for a new BRP belt that had enough width. We adjusted the two set-screws on the end the jackshaft to get the proper adjustment. We kept the old belt as a spare. When doing your storage preparations you may find things that need attention. We noticed while cleaning that one engine mount was really loose, so we tightened it.
Throttle Body Service
The owner’s manual suggests that you clean the intake side of the throttle body. While the belt is still off, it’s easy to take this intake tube off for an inspection.

We took a clean white rag and wiped the inside on this tube and the intake of the throttle body. We were surprised to find so much grime and dirt. When installing this tube be sure to connect the smaller tubing inside, behind the intake tube.
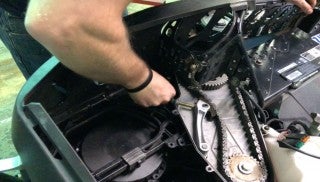
Chain case Service
Chain case oil change – this job on the REV-XP and REV-XR is more difficult when compared to the previous models. There is no longer a drain plug on the bottom of the chain case assembly. To make matters worse, this project sled had electric start and a mechanical reverse. This means taking apart the chain case would be a lot of work removing a battery and the reverse components. We tried something else; we removed the fill level plug. It has a strong magnet on the end of it to hold metal fragments and it is strong enough to hold a socket shown below.

We turned the sled on its side and the oil drained out the fill level hole. But, this method is messy, so get ready with some rags. We were surprised how well this worked, the clean up wasn’t as bad as you would think either. With the snowmobile back on its feet and level once again, we filled the chain case up with the recommended BRP synthetic oil. The synthetic oil has a longer life expectancy when compared to the standard mineral based chain case oil. The new oil came out very clean at the oil level hole telling us we had the proper level. Simply re-install the clean plug.
Rear Suspension Service
Now is a good time to check for worn parts. Since the rear skid on our project sled needed new sliders, we pulled out the rear suspension. When we saw that the factory only installs one limiter strap, we decided to add a second one to balance this rear suspension. To our way of thinking, if there are two straps this is proactive. If one strap breaks, the rear suspension will still operate the way that it should.

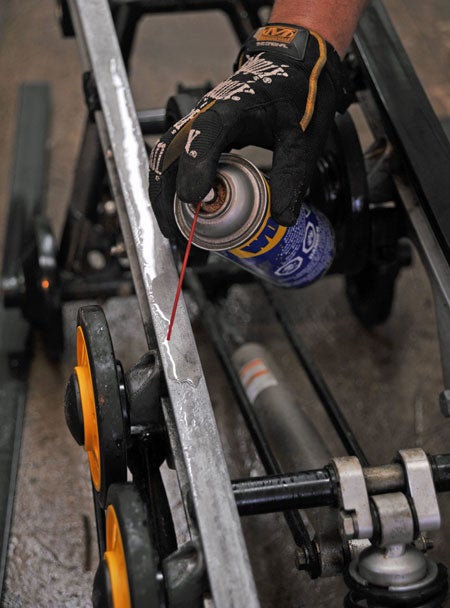
Installing new sliders is an easy operation and with a little WD 40 it’s even easier.
Having two people for this job helps – one pulling on the old slider and the other tapping it off with a hammer on the other end makes it a simple task. During our rear suspension inspection, we also noticed some of the idler wheels were loose. We noticed that the fasteners that hold the blocks to the rails were loose. This was a warranty issue for BRP in their first year. The alloy rivets are NOT strong enough to hold the idler wheel assemblies in place. We replaced these alloy fasteners with plated steel bolts and made them secure once again.
Start a Fixer-Upper Project This Summer
During the installation of the rear suspension, we found that a little piece of electrical tape wrapped around the bushings to hold them temporarily in place made the install much easier.
We finished this project off by removing half worn carbides from the Pilot skis and mounting them outboard, the same way these skis were used back in the earlier REV days. We installed fresh carbides in the center of these skis, which will certainly help steer this sled in the right direction.
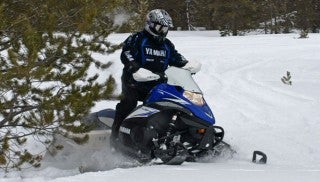
Now with all this preventative maintenance this sled will have many miles of trouble free riding for next season. Plus, when that first snow comes, we’ll be ready to ride and enjoy!


 Your Privacy Choices